
Mike McDonald


One of my new years resolutions was to make a website. Inspired by today’s “Ask HN: Excluding WordPress, what is your favorite for blogs or small stores?" I finally pushed myself to get a site together.

I’ve made lots of terrible (mostly chat) apps to showcase various Firebase/Google features, but never had time to build a personal site.
I love tech, but I also try to have hobbies outside of work: among them cooking, mixology, travel, and the outdoors. I’ve had some unique experiences, and I’d love to share them with others.
Anyways, as is custom when an IT professional creates a personal site, here’s the nitty-gritty details on how it was built!
The old Firebase site used Jekyll (and claimed to be the largest such site in existence at the time), but I had mixed feelings about using it. Build times were pretty long, gems were often updated from under me causing things to break, and I was annoyed by the quirks of running Ruby.
After a short amount of research
I opted to go for Hugo, primarily because of the fast build
times, straightforward content model, and a clean toolchain. Many of the listed
negatives (lack of an asset pipeline, lack of extensions) also don’t bother me:
I’m fine with vanilla js and css, and I don’t think I’m yet at the point
where I need tons of extensions.
Additionally, Go and Swift are two languages I’m hoping to work with more often in 2017. I figured this would be a good way to get started with Go, after my brief foray into Swift at the end of 2016.
I followed the Hugo quickstart, which was generally pretty helpful, though they did the annoying thing of making you fail, then explaining how to fix it vs explaining how to get things set up correctly in the first place (see Steps 4 and 5). I picked the Cocoa theme, though I plan on forking it in the future and customizing it further.
Since I work for Firebase, I opted to use Firebase Hosting. Getting it set up with Hugo was as easy as:
firebase init                                # initialize firebase hosting
env HUGO_BASEURL="http://localhost:5000" \   # set the base URL as localhost
hugo --theme=cocoa \                         # build the site
&& firebase serve                            # test locally
Otherwise, just use hugo server --theme=cocoa to test using the build in Hugo
server. I wanted to ensure that it would work with Firebase Hosting, hence the
extra step of setting the baseURL before building the site.
Maybe, someday when I’m more adventurous, I’ll explore using Google Cloud Storage directly. But for now, free web hosting + SSL + custom domain support combined with a dead simple deployment story has me hooked.
After a quick hunt on domai.nr, I bought mikemcdonald.co
on Namecheap for around ~$25/year. Came with a free
year of whoisguard, and was about $10 cheaper than
Google Domains.
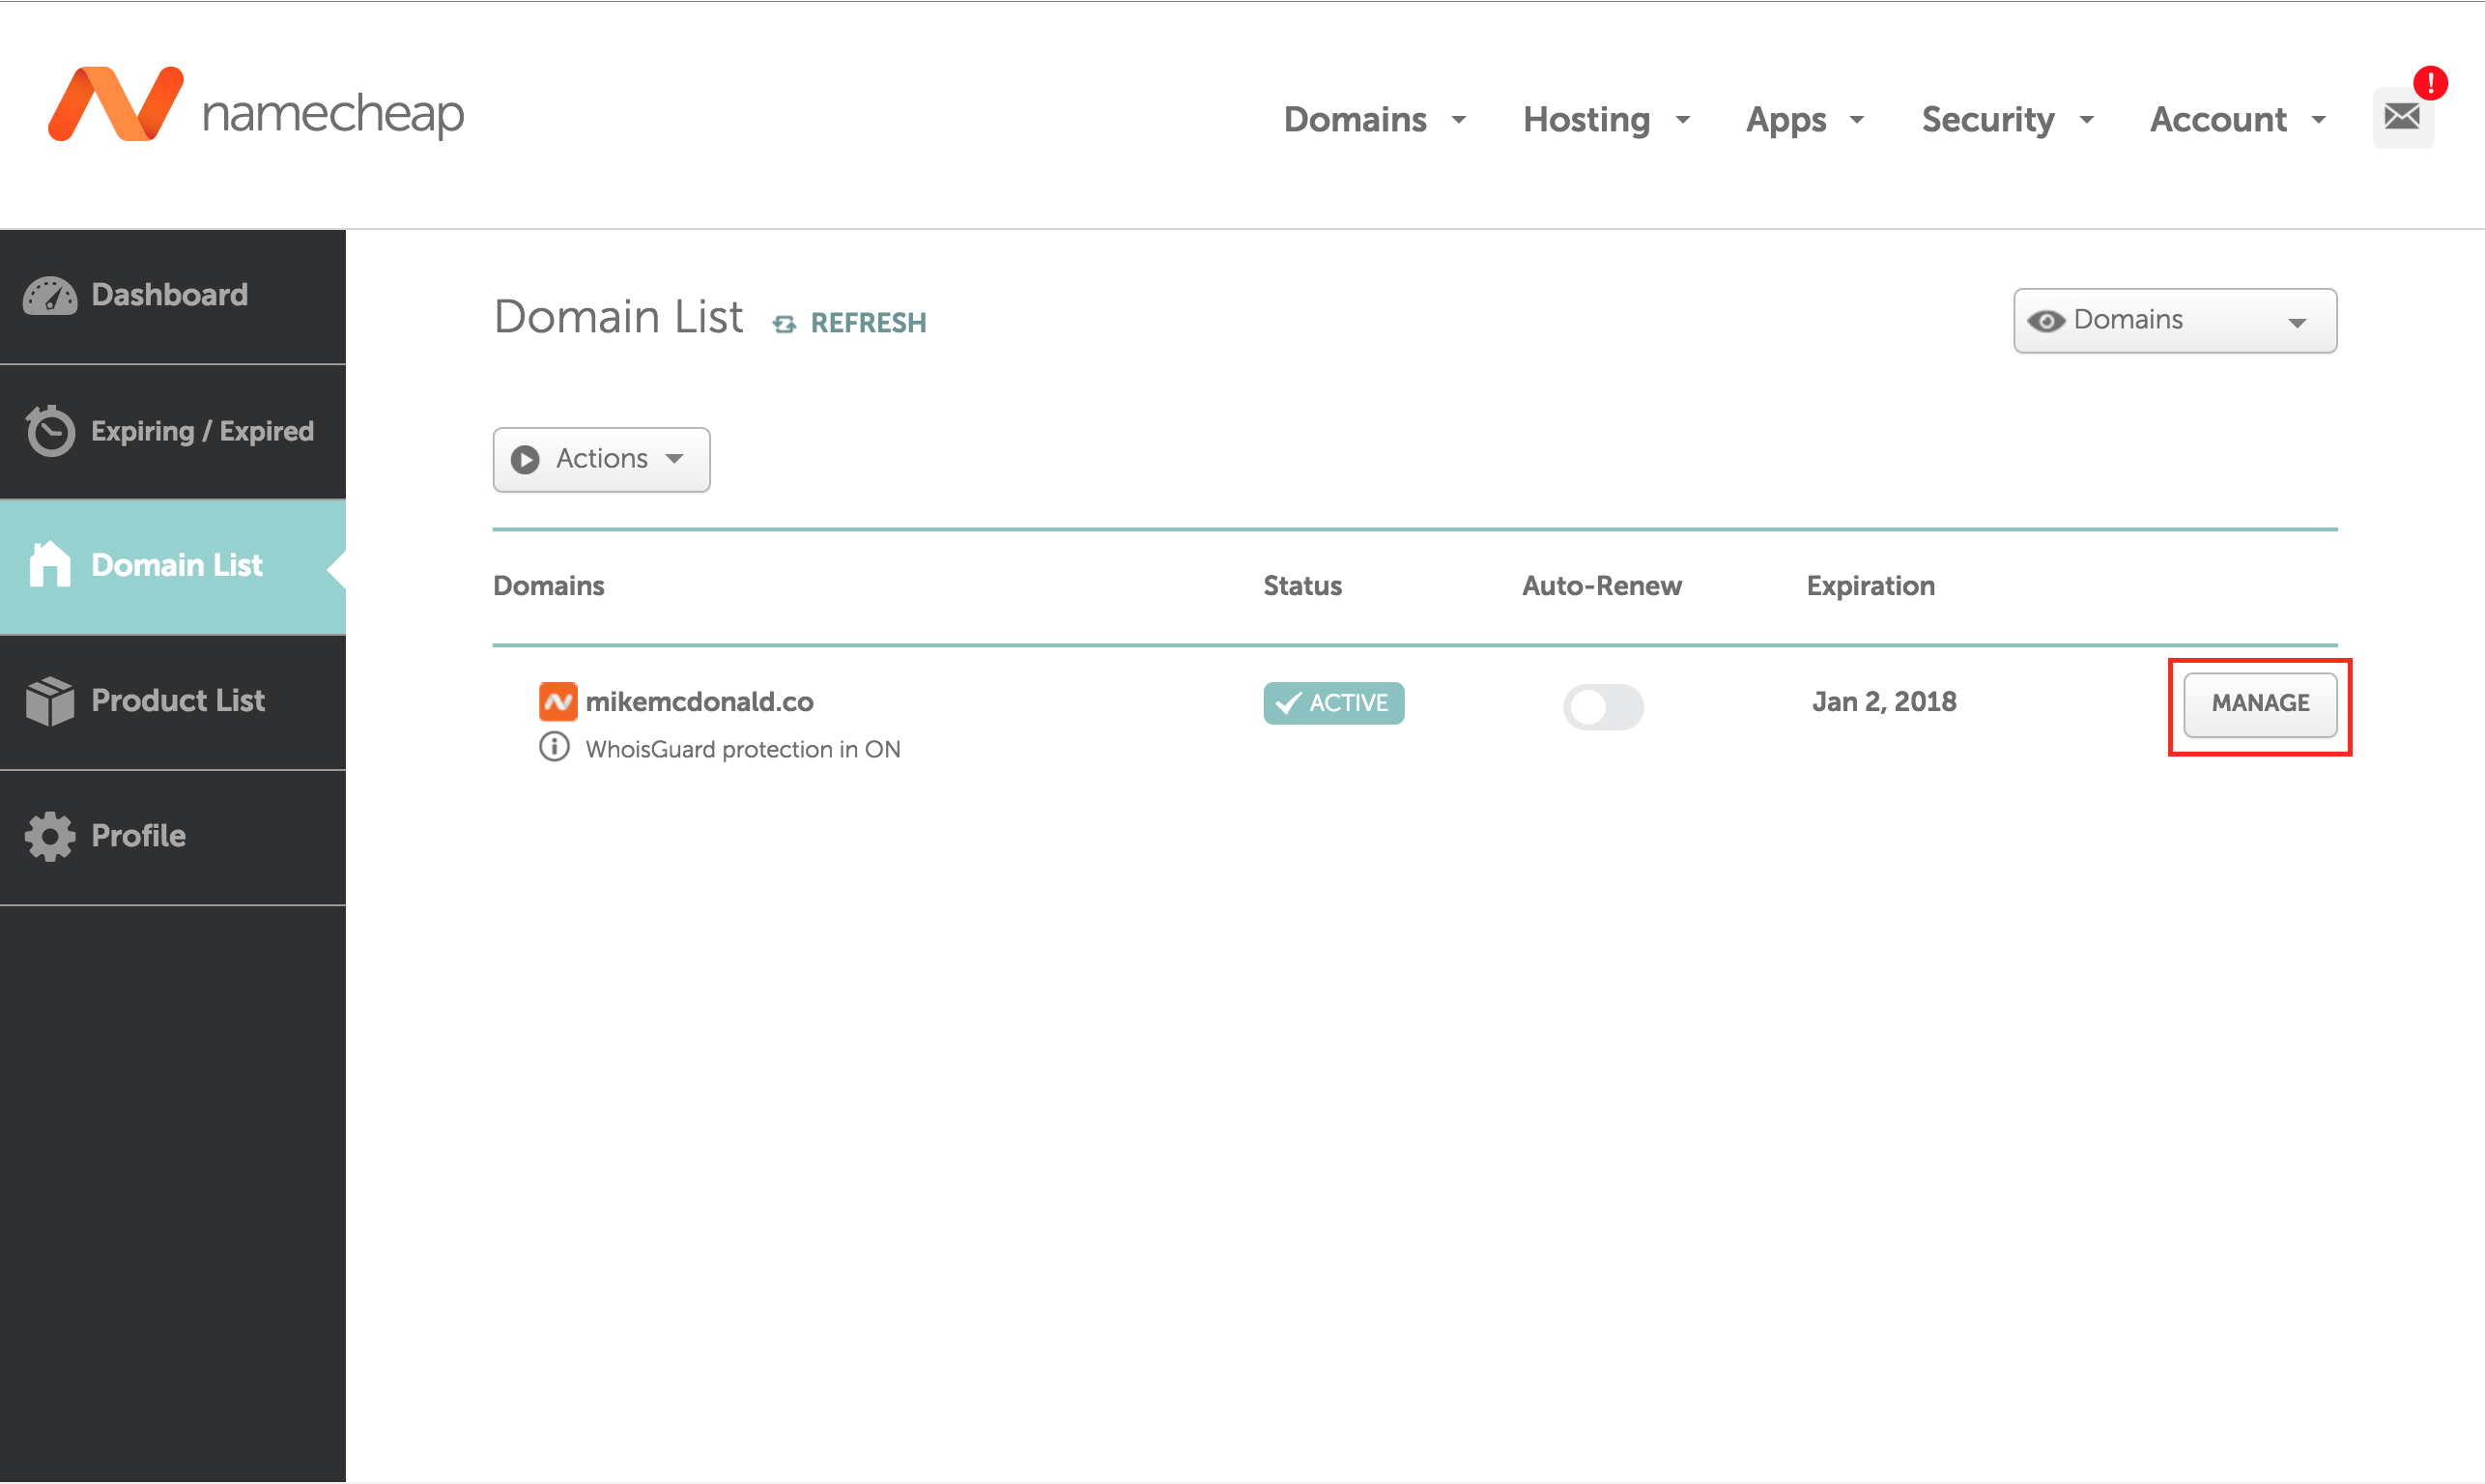
Setting up the domain with Firebase Hosting is straight forward, though adding
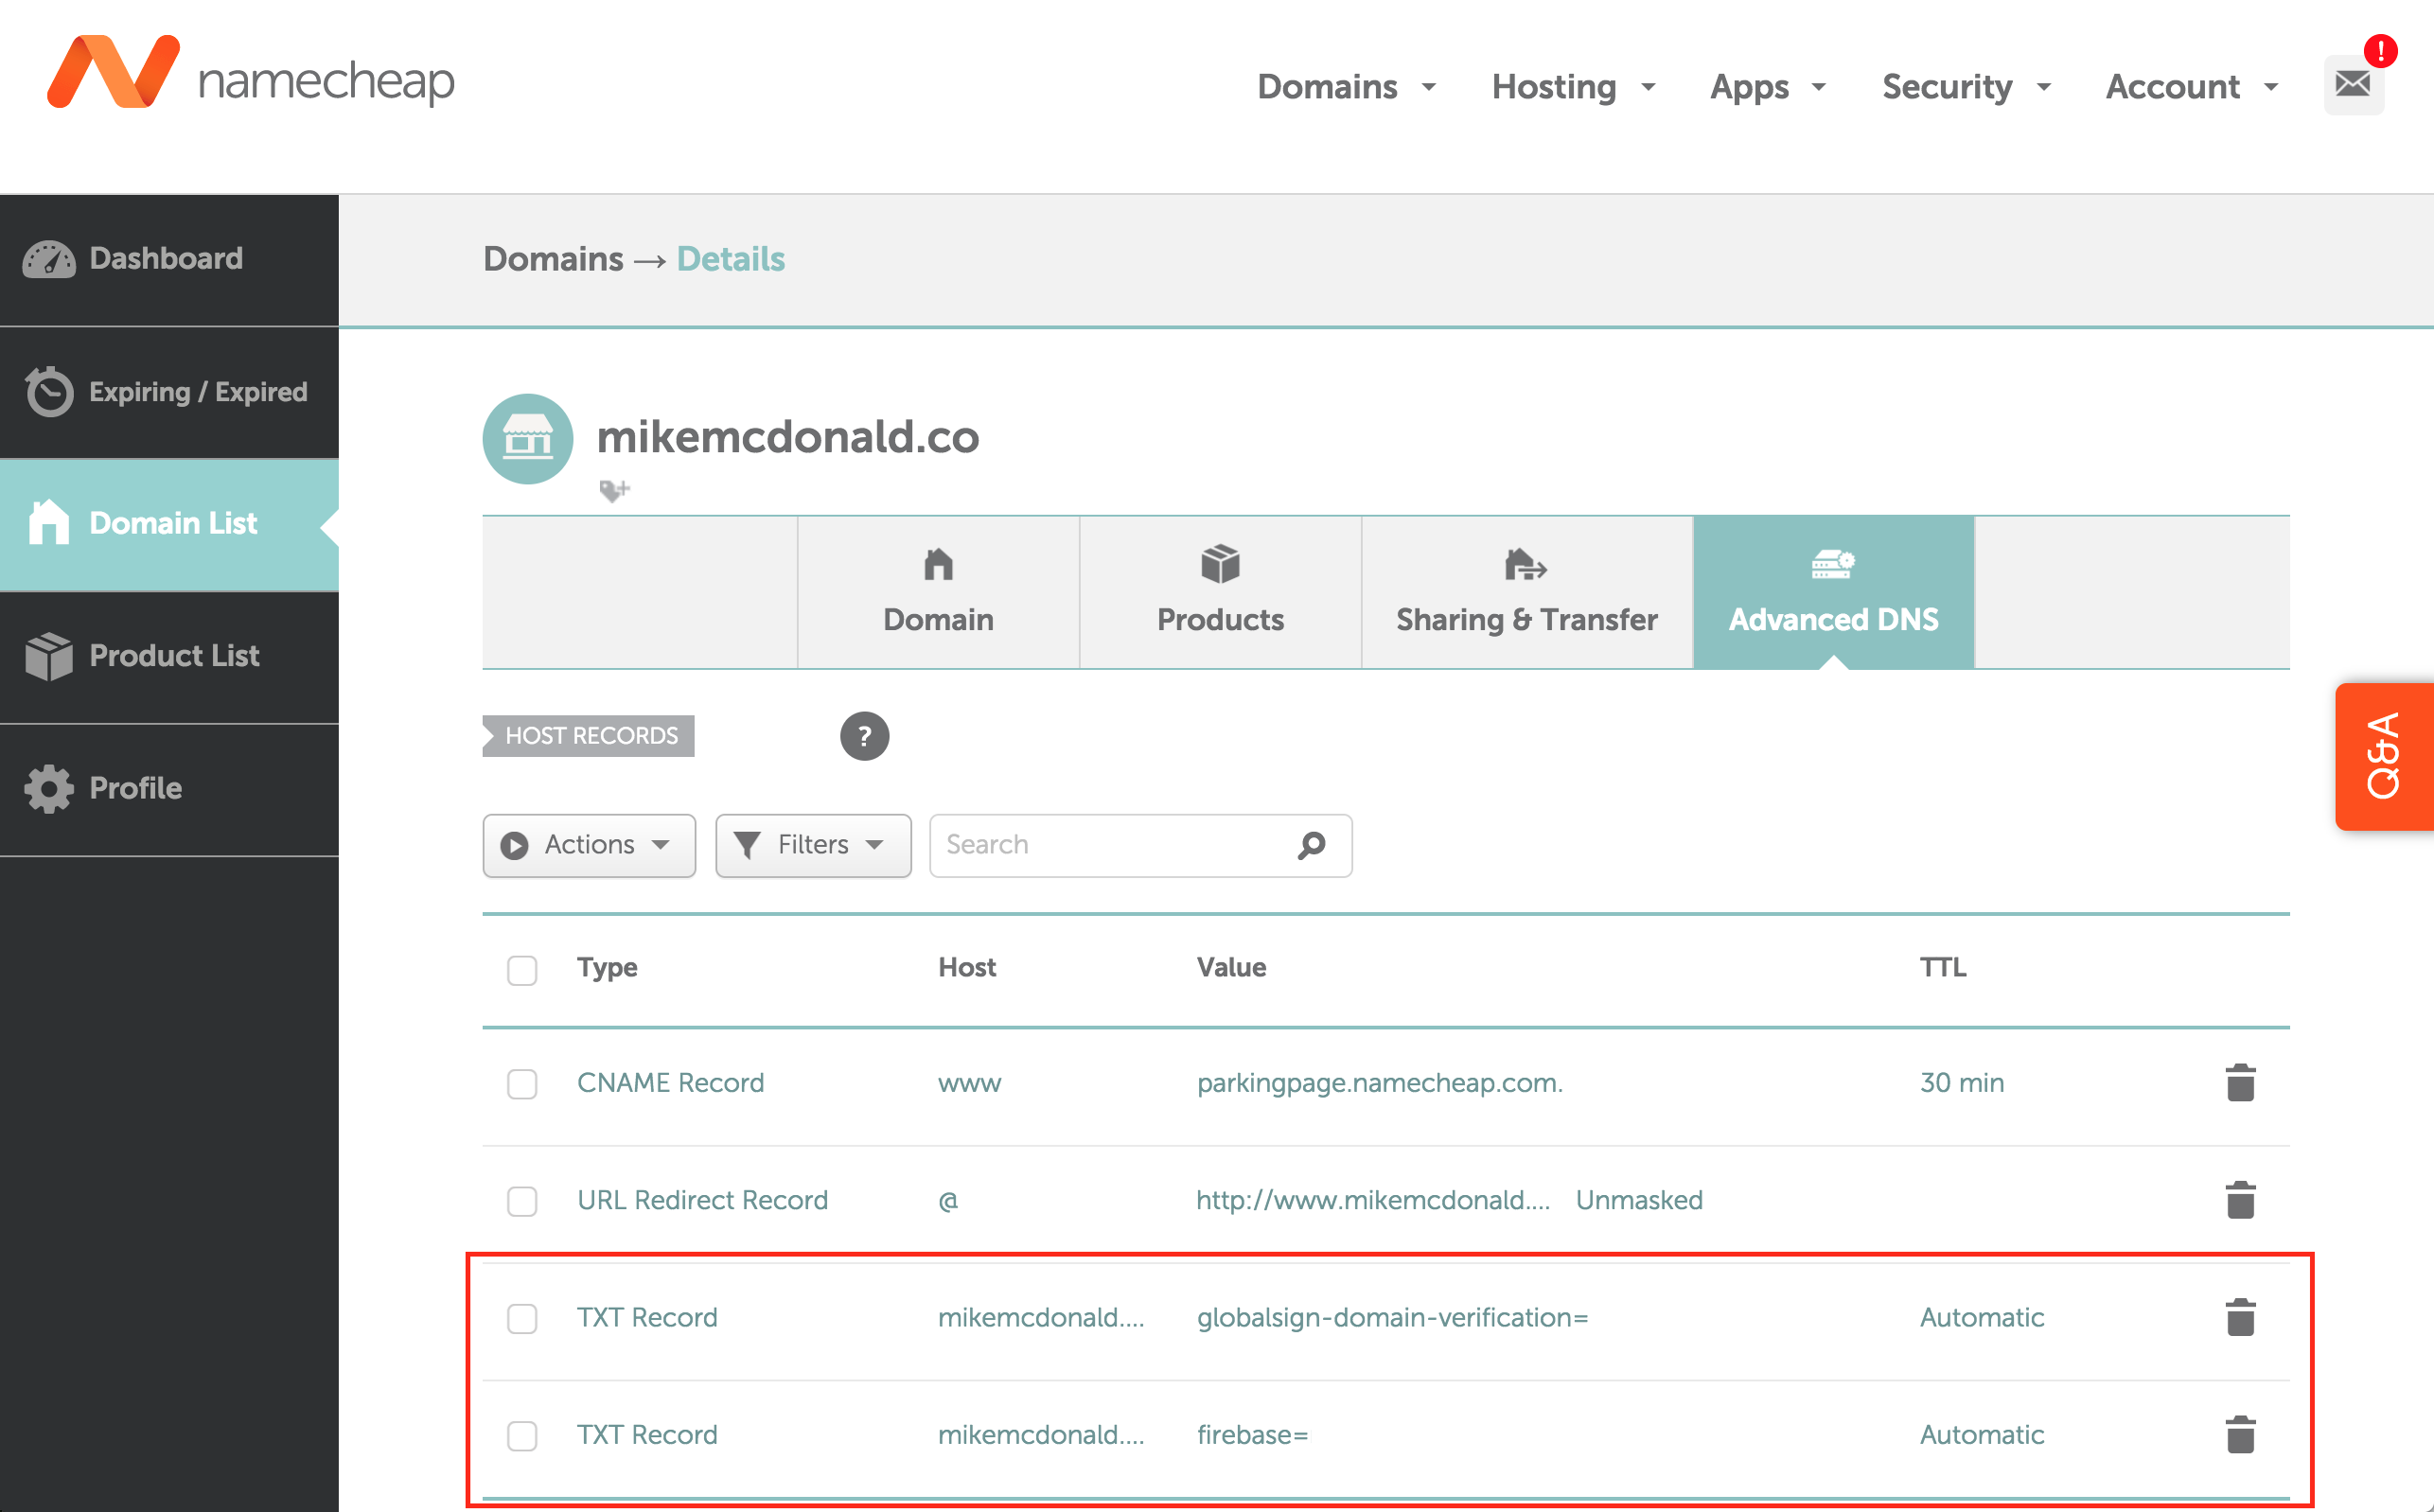
the TXT records on Namecheap took a quick search to find the right places.
I’ve copied images that show how to select the right domain (click “manage”):
And how to add the correct TXT records:
The one thing left to do is hook up an email address, though I haven’t decided if I want to go the gSuite route, or hack it together with Zoho or Mailgun. The former looks more scalable (10k email/month limit with Mailgun), but the latter has way fewer steps.
After that, I hooked up Google Analytics,
committed everything to a git repo, and launched:
hugo --theme=cocoa && firebase deploy # 🚢
All in all, it took about three hours, $25, and a bit of motivation. Overall, a great learning experience that I’m looking forward to sharing with you all!